Friday, November 25, 2011

Our family's heirloom Recipe: Cream of Chicken


Every family has a food dish that identifies them,
a food that symbolizes their bond. For my family, that
honor goes to Cream of Chicken.

My Dad who was a cook in the US Navy for 25 years,
introduced this dish to the family and it was only made
on special occasions such as Birthdays, Christmas Noche Buena.
During his career, he must have cooked and prepared this dish
on ships and military base Galleys.

Dad never formally passed down the dish to his children
as a heirloom recipe. Well, I was lucky enough to get
the dish from him firsthand. One vacation day in 2007, while in
Baguio City, I stood at his Kitchen , pen and paper in hand
and started taking notes on how he made his Cream of Chicken.

The recipe in Word format sat on my Laptop for years, gave a printed copy
of the recipe to my siblings. One day, my laptop was stolen
along with my Cream of Chicken recipe.

I prepared Cream of Chicken for our Thanksgiving dinner
and I am rewriting the Cream of Chicken recipe again
based from memory. This time, I'm uploading
the recipe to my Cooking Blog website so it doesn't get lost again
and for everyone who is willing to make it follow along.

I hope you take time to make the dish and enjoy it.

So, what is your family's special Recipe?

Cream of Chicken


Ingredients:

1 whole poultry chicken, cleaned
5 eggs
3 ribs of celery cut into strips
2 green bell peppers cut into squares
2 red bell peppers cut into squares
1/2 cup butter in room temperature
1 cup button mushroom cur longitudinally
1-1/2 cups all-purpose four
~ 6 cups of water
2 cups of fresh or a can condensed milk
salt and pepper to taste


Serving: 6


Cooking Procedure:

  1. In a Dutch oven or large pot, put in the whole chicken.
  2. Put in the eggs in the pot being careful not to crack them.
  3. Fill the Pot with water until the chicken is submerged.
  4. Cover pot with lid and bring to a boil.
  5. Refill pot with water as they evaporate.
  6. Cook the chicken in boiling water to soften it for a good 20 minutes.
  7. Use a kitchen tong tool to transfer chicken to a plate or pan to catch the drippings.
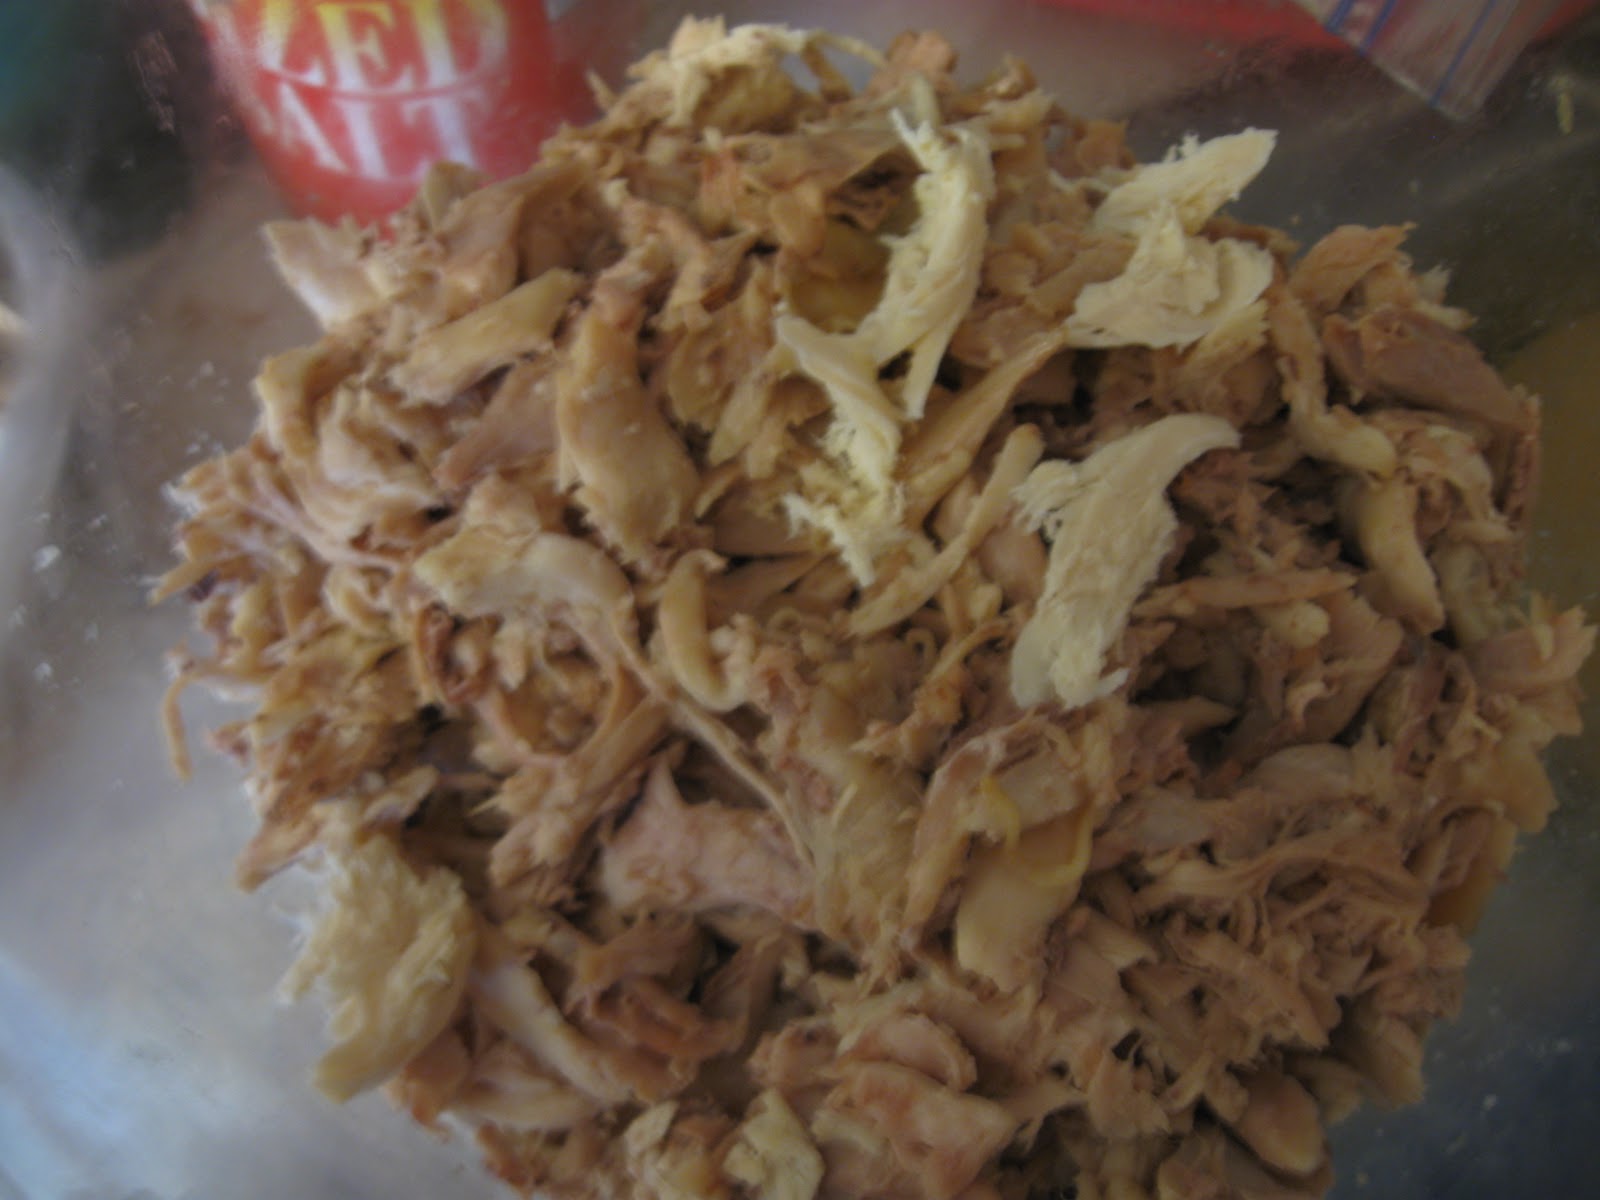
  8. Patiently tear off  chicken meat strips from the carcass and place in bowl. Discard the chicken skin. Set it aside. 

    9.  Blanche the vegetables by putting them into the boiling Chicken broth mixture.
    10. Use a colander to strain and remove vegetables from chicken broth and cool down with ice cold
          water. Place in bowl and set aside.

     11.  Use the colander to remove hard boiled eggs from Chicken broth and peel off shell. Chop the eggs.
  12.  Transfer Chicken broth to a bow and set aside.
  13. In the same Cooking Pot, under low heat, melt butter.
  14. Make a rue by doing the following:
      A. Gradually introduce the flour to the pot with the left hand while
           stirring the mixture using a wire whisk with the right hand.
          Reverse the order if you're left handed ;-)  

        B. Keep stirring until the mixture has a nutty aroma and color turns golden brown in color.
        C. Adjust heat to medium level.
        D. Use a ladle or measuring cup to gradually introduce chicken broth to the rue until you attain a thick consistency. Keep stirring the rue with a wire whisk.

 15. Add the chicken strips to the rue.

  16. Add the chopped eggs followed by cut mushrooms.
    17.  Add in the blanched vegetables.
    18. Gradually introduce the condensed milk being careful to maintain that thick cream consistency. Stir the mixture with a wire whisk.

    19.  You should have a Cream of Chicken consistency as shown below.

    20. Season the Cream of Chicken with salt and pepper to taste.
    21 Serve Cream of Chicken while its piping  hot.


Sunday, November 20, 2011

Cooking comfort food for an Autumn night sleepover


Its a Sunday Autumn evening, and although I have work Monday, the following day, my eldest son Justin decided to have a sleepover with his friends at home or one of those late night stay-in house to play video games, watch videos in YouTube and everything else that teenagers like to do or play for their generation.

Its Thanksgiving Break after all and they don't have school for the week. I've grown accustomed to these kids' sleepovers through the years, and I've cooked my culinary creations for their sleepovers on numerous times.

My two other younger kids are at home as well.

So to cook up a special dinner for the occasion, I decided to do a rerun of that Bistek Tagalog with soy-lemon fried rice in a sizzling plate dish that I posted in an earlier blog entry.

This time I decided to pair the dish it with Chicken Sopas suitable for the colder weathers.
Nothing's more comforting than a warm soup on a cold Autumn or winter evening.

Try this combination out sometime specially that the colder months are upon us.


Beef and Eggs bowl

I made Beef and Eggs bowl for the kids' Brunch on
a cold Autumn morning.

I didn't make this dish up.Its based on a Cooking demonstration video
that Foodtrip28 uploaded in YouTube. According to Foodtrip28, he came upon this dish while eating at a Japanese Restaurant in Hong Kong.So I am assuming it has Japanese origins.

Click on the link below to view his video demonstration on how
to cook Beef and Eggs bowl.

Foodtrip28's Beef and Eggs bowl

Try cooking this dish sometime.

Saturday, November 19, 2011

Pininyahang Manok (Chicken with Pineapple stew)

I cooked Pininyahang Manok (Chicken with Pineapple  stew) for dinner.

I let the kids and my nephew Calvin go ahead eat dinner while I enjoyed a Persimmon fruit. By the time I finished eating my Persimmon, there were two itty bitty pieces of Pininyahang Manok left for me. Goes to show that the dish was good, he he.

There's two versions online that I had at my disposal to cook this dish:
Click on the two link below to see two different versions of cooking this dish.

Panlasang Pinoy's  Pininyahang Manok

and

FoodTrip28  Pininyahang Manok

Their versions are pretty close but I chose
Panlasang Pinoy's  version.

try cooking this sometime for dinner on a cold winter night.

Saturday, November 12, 2011

Thai Rice with Tortang Giniling


I made Foodtrip28's version of Thai Fried Rice and his Tortang Giniling for the kid's breakfast.
Who's Foodtrip28, you might ask. He owns one of my favorite YouTube channels
and he specialized in Filipino Cooking and other Asian cuisines he encountered during his trip to 
Hong Kong.


I'm surprised to realize he didn't upload Thai Fried Rice recipe  in his YouTube28
Foodtrip28 channel. His Totrtang giniling however is available for viewing in his Youtube channel.


To view his Tortang Giniling cooking video, click on the link below.

Saturday, November 5, 2011

home made V8 Juice

Here a vegetable juice Recipe that I make at home all the time.

Its refreshing, healthy, high in nutrients such as Vitamin A, Vitamin C, Vitamin E, Thiamine,
Vitamin B6, Folic Acid, and Potassium yet low in calories.

Ingredients in this juice has properties that can help support
a healthy blood pressure and blood vessels and at the same
time taste great. Try it!

Energy  ***
Detox   *****
Immunity *****
Digestion ***
Skin  ****

Equipment needed: Juicer Machine

Ingredients:

2 carrots
Spinach, handful
2 tomatoes, halfed
3 celery ribs
1/2 cucumber
1/2 green or red bell pepper
1/2 Lemon

Preparation procedure:
1. Thoroughly wash all vegetables.
2. Feed ll the vegetables into the juicer machine to extract the juice from the pulp of the vegetables.
3. Transfer juice in a glass.
4. Season with a dash of Tabasco.
5. Stir juice with a teaspoon.
6. Drink juice as soon as possible for best results.

Reference: The Complete Book of Juicing, by Michael Murray, page 227.

My Breakfast Burrito with a Filipino flair


I love Saturday mornings. I can take my take to cook a
well thought-out breakfast without having to worry about
hushing kids to school or that I might be late
to jump on the morning rush traffic to make it to work in time.

This morning, I made Breakfast Burrito with a Filipino
flair for my kids. What makes it Filipino you might ask?
I used Longanisa, which is a sweet smoky flavored sausage
mainly found in the Philippines. You could use any smoky flavored
sausage or Chorizo I suppose. I also used garlic
fried rice which is common in Filipino breakfast.

Well, I hope you could try this out sometime.
Here's my recipe:

Servings: 4

Ingredients:

6 Longanisa Sausage cut across to make strips
2 peices of ham, chopped
2 cups cold left over rice
2 stalks spring onions chopped
1 tablespoon minced garlic
5 eggs
Shredded Cheddar Cheese
Sour Cream
1 medium tomato cubed
4 flour tortillas
A jar of Salsa Sauce or Tabasco (optional)

Cooking Procedure:
1. Heat a wok pan, heat 2 teaspoons of cooking oil and
     saute garlic till light brown.
2. Stir fry the cold rice, add spring onions.
3. Set aside the fried rice in a plate.
4. Place eggs in a bowl, beat with a fork. Season with table salt.
5. In the same wok pan, heat 2 teaspoons of cooking oil
    and pour beaten egg mixture into pan.
6. Constantly stir the egg mixture with a fork or spatula to make scrambled eggs.
    Set the scrmbled eggs aside in a plate.

7. In the same wok pan, heat the flour tortilla on both sides one at a time.

8.  Transfer tortilla to a serving plate.
9. Assemble the Breakfast Burrito:
    a. First place 2 tablespoon on fried rice on the Tortilla.
    b. Place scrambled eggs on top of the rice followed by longanisa sausage and ham.
    c. Put a layer of chopped tomatoes on the Burrito.
    d. Put a layer of cheese followed by sour cream.

    e. Gently flap the sides of the Tortilla wrap to make a roll.
    f. You can sprinkle the Burrito with Tabasco Hot Sauce or Salsa

Wednesday, October 26, 2011

Bistek Tagalog with Soy-Lemon Fried Rice served on a Sizzling Plate


I cooked this Bistek Tagalog with Soy-Lemon Fried Rice served on a Sizzling Plate tonight for Dinner.
I was inspired by Foodtrip28's Bistek Tagalog video posting in YouTube for this culinary creation.
See his Bistek Tagalog video by going to: 


Since he didn't post a detailed step-by-step Recipe for his Bistek Tagalog, here is an approximate procedure based on my observation:

Foodtrip28's version of Bistek Tagalog
Ingredient's:
  • 300 grams of thinly sliced Flank Steak  cut into strips
  • 1/4 cup dark soy sauce
  • 1/4 cup Juice of Lemon or Calamansi
  • 1/2 cup of water
  • 2 tablespoon chopped onions
  • An Onion cut into concentric rings
  • Dollop of butter (1/2 teaspoon) 
  • 1.5 cup cold rice
Cooking Procedure:
  1. In a bowl place the  thinly sliced Flank Steak  cut in strips. Marinate with Lemon and Soy Sauce.
  2. Set aside the steak for it to marinate around 2 hours to 6 hours.
  3. In a wok pan heat 2 tablespoon of cooking oil.
  4. Place the onions rings to the Wok pan and heat until they become semi translucent
  5. Set the Onion rings aside in a plate.
  6. In the same Wok pan, transfer into it the flank steak strips until they become cooked. Stir frequently.
  7. Set aside the steak to a corner of the Wok pan and saute the chopped onions.
  8. Meanwhile, heat the cast iron sizzling pan on a separate stove burner.
  9. Stir to combine the Steak strips with the chopped garlic.
  10. Add water and bring the broth to a boil.
  11. Adjust the Bistek's broth to taste.
  12. Place a dollop of butter on the sizzling plate and spread the melted butter all over.
  13. Transfer the cooked Bistek Tagalog to the sizzling plate at a corner.
  14. Meanwhile, place the cold rice on the Wok Pan with the left over broth still in the pan.
  15. Stir the rice frequently and break apart using a wooden spatula.
  16. Shape the fried rice using a small bowl and place in a corner of the sizzling plate.
  17. Serve the Bistek Tagalog with Soy-Lemon Fried Rice on a Sizzling Plate while hot.

Saturday, October 22, 2011

My Homemade Siopao Asado and Siopao Sauce


I made Siopao Asado and matching homemade Siopao Sauce for lunch today.

Justin tried out my homemade Siopao and his comment upon trying it is "its good".

My siopao wrapping technique leaves room for improvement but I'll get better at it as I make more.


Friday, September 9, 2011

Ampalaya-Carrot Juice

Amapalaya also known as Bitter Mellon or Bitter Gourd
is called bitter for a reason. Its just plain bitter
pure and simple! Besides Ginisang Monggo, how can you
eat this vegetable as part of an everyday diet?

There are several anecdotal studies
about the benefits of Ampalya to diseases such as type 2 diabetes.
The benefits of Ampalaya is well known
in Chinese and Asian Herbal medicine practices.

In the West, clinical studies about the benefits of the vegetable are
not established sufficiently.

To balance out its bitter taste, I combined it with
the sweet taste of carrots, apple and celery.
I can still taste the bitterness of the mellon
but at least its minimized.

Ingredients:
2 Fuji Apple cut into slices
2 stalks of celery
3 carrots
1/2 Ampalaya deseeded and cut longitudinally

Materials needed: Juicer machine

Preparation steps:
1. Wash all fruits and vegetables thoroughly.
2. Place a glass on the discharge spout of a Juicer machine.
3. Feed above ingredients to the Juicer machine.
4. Use a spoon to stir the resulting juice.
5. Drink juice as soon as possible to prevent it from oxidizing.

Wednesday, September 7, 2011

Papaya Salad Smoothie

Papaya is a tropical fruit that
is rich in carotenes, vitamin C,
folic acid, Vitamin B1, B3, B5, B6,
flavonoids.

Most of Papayas in the US come
from Mexico or other parts of Central
America. If you can find Papaya
at your local market, make this delicious
smoothie for breakfast.

Ingredients:
1/2 papaya
1/2 pineapple cut into chunks
1 cup pineapple juice (~120 ml)
1 orange (peeled)
1 apple, cut into slices
1 tray of ice cubes

Smoothie preparation procedure:
Place all ingredients in a Blender.
Push 'Smoothie' button. Pour in a glass.
Enjoy for breakfast.


ENERGY *****
DETOX ***
IMMUNITY ****
DIGESTION ****
SKIN ****

Monday, September 5, 2011

My basic Apple Juice


Ingredients:
- 2 Apple
- 4 Carrots
- 2 Stalks Celery

A simple introduction to juicing.

Nutrients:
Beta -Carotene, folic acid, Vitamin C, calcium, magnesium, phosphorous, pottasium, sodium , sulfur

ENERGY ****
DETOX ****
IMMUNITY **
DIGESTION **
SKIN ****


Sunday, September 4, 2011

Let's Juice towards a healthy diet


Let's Juice towards a healthy diet


I used to juice fruits and vegetables
a few years back.


Then my old Juicer machine somehow broke
and failed to catch on with the practice.


Fast forward a few years later
and I realize the value of juicing again.
As I aged, I realize the importance and role
of fruits and vegetables in its raw , uncooked form
in my diet.


For the coming weeks, I will share some of my
favorite juices and concoctions in hopes
that you will catch on to juicing as well.

Chicken Hototay Soup

Ground Pork, shredded Chicken, mixed with
vegetables: carrots, cabbage, onions and garlic, with
mushrooms in a rich Chicken Broth soup, garnished
with a cracked egg.

Supper is served.


Thanks to Panlasang Pinoy for the inspiration
to cook this dish.


Yang Chow fried rice

Yang Chow fried rice.

Its what the kids had for breakfast.

Leftover Rice stir fried with BBQ Pork,
Shrimps, scrambled eggs, green peas,
seasoned with garlic, onions, ginger,
green onions, lemon grass, makes for
a sumptuous breakfast on a
Saturday morning.


Thanks to PanlasangPinoy for the inspiration
to create this dish.

Monday, July 25, 2011

The Economic impact of Cooking Skills

I didn't really realize the economic
impact of cooking skills until this weekend.

I was watching the Suze Orman show out of
CNBC Network this whole weekend. Well, her shows are
available via Podcast so I watched each and every past episode
back to back, all weekend.

For those of you who are not aware of her show,
it is broadcast every Saturdays, and it is about
financial advises, the know-hows for Consumers like each and every one of us,
on how to survive the recent 'not-so-good' economic times,
best ways to manage your money, finances, retirement, College savings for the kids.

Anyway, it is interesting to note that among the advises
that she gives all the time for overspending couples, money strapped listeners
is that, as a saving measure to 'cut down on your eating out'
and rely more on cooking and preparing home cooked
meals. I couldn't agree more.

The ability to cook, create delicious, nutritious meals at home
and at the same time not breaking the bank translates
into savings which can be saved or spent on
other things.


Have a great week ahead.

Tuesday, June 21, 2011

Secrets to a juicy and tasty Steak

Repost from my 2007 blog entry:

According to Food Up Blog, a New York steak is cut from the short loin area next to the tenderloin. They continue on to say that this is another great steak—good beefy flavor, and tender meat.

Below is my cut up New York steak with Mushroom Sauce gravy and freshly chopped mushrooms.


Yet part of the trick to a juicy and tender steak is the method of how you cook it.

I learned how to cook and cut steak from a recent Cooking class I took.
I don't claim to be an expert on this topic. I just wanted to share what I learned in the class. The Instructor is a chef so I guess the teacher knew what what he was talking about based from experience and knowledge.

First technique I learned is that it is best marinate a Steak for two days prior to cooking it. A Steak Marinate recipe is provided below. My teacher told us that this technique is old school, a practice done before the 1950's. Modern Restaurants and Steak houses these days do not prepare Steak meats this way anymore. I have yet to find out why the trend changed.

Second Technique I learned is, leave the steak alone for a good five to ten minutes as soon as you take it out of the oven. The steak continues to cook even when taken out of the oven. This 'rest' period allows the juices to distribute throughout the steak resulting in a juicy steak. Cut it sooner and juices will ooze out of the steak resulting in a dry steak.

Third technique I learned in cooking Steak is that, the way you cut the steak will determine whether the steak is tender or tough to chew. YOU ALWAYS CUT THE STEAK PERPENDICULAR TO THE GRAIN OF THE MEAT. You can cut it such the the blade of the knife is perpendicular to the chopping board or at an angle about 45 degrees incline.

Try experimenting one time if you can tell the difference. Cut the Steak parallel to the grain and perpendicular to the grain of the meat. You will notice that the meat cut perpendicular to the grain will be more tender.

Here's a London Broil Steak Recipe you can try at home.

London Broil Steak or flank steak

Marinade:
3/4 cup Salad Oil
3/4 cup Soy Sauce
1/2 cup fresh lemon juice
1/2 cup yellow mustard
2 tablespoon salt
1 tablespoon pepper
2 teaspoon chopped garlic

1. Make marinade and put in a resealable plastic bag.

2.Put the steak in the resealable bag. Squeeze out air and seal. Put the bag in a bowl and refrigerate for 24 hours up to two days.

3. Occasionally invert the bag to distribute the marinade.

4. Pre-heat an oven at Broiler setting. Keep the oven's door open ajar so that the temperature is maintained. A closed oven door will trigger the oven's thermostat which temporarily shuts off the oven. Adjust the oven grate at the highest level

5. Broil the Steak in oven for 3 to 4 minutes each side. Put the steak at the highest level to get the maximum heat. Less time for Rare Steak.

6. Transfer Steak to a pan and let stand for a good 10 - 15 minutes or more to let the juices redistribute.

7. Slice meat across the grain, in thin strips and serve warm with mash potatoes and gravy.


-Julius

Monday, June 20, 2011

Spicy Oven Cooked Spare Ribs


For Father's Day, I cooked spicy Oven roasted
Spare ribs for the kids' sleep over.

Succulent, spicy, tender ribs, the meat falling off the bone and melts in your mouth.
This dish is all over YouTube but this entry is my version.
For Summer outdoor cooking, try and make this yourself.
You won't regret the decision to give it a try.

Preparation time: 20 minutes
Cooking time: 1.5 to 2 hours

Materials needed:
- Wide Pyrex glass tray or baking aluminum tray
- Aluminum foil

Ingredients:

- 4 tablespoon light brown sugar
- 2 teaspoon salt
- 2 teaspoon chili powder
- 2 teaspoon paprika
- 2 teaspoon oregano
- 2 teaspoon freshly ground black pepper
- 2 teaspoon garlic powder
- 2 teaspoon cumin
- 1 rack of Pork spare ribs
- 5 tablespoon Barbecue Sauce
- 1/2 to 1 cup of water

Procedure:
1. Preheat the Oven at 350 degrees Fahrenheit (177 degrees Centigrade)

2. Make the dry rub. In a small bowl, mix all the dry ingredients with your fingertips.


3. Remove the thin membrane off of the back of each rib.

4. Use the rub to season the Ribs on both sides.


5. Use an aluminum foil to cover the surface of a wide Pyrex tray or a aluminum baking tray. Place the rack of Ribs on the tray.

6. Pour the 1/2 cup of water on the tray. Cover with glass lid or an aluminum foil.

7. Fire up two burners on the stove on medium heat. Place tray on the stove, and let the water steam for 30 - 40 minutes. Add more water if it dries up.

8. Transfer tray in the oven and continue to cook ribs for 20 minutes to 45 minutes.

9. Transfer tray back on stove burners.

10. Spread a moderate layer of barbecue sauce on top of the ribs.

11.Transfer to oven and continue to bake with tray open

12. Baste the barbecue sauce over the ribs every 15 minutes for the next 30 minutes.

13. Transfer tray to counter top and let rest for 30 minutes.

14. Serve warm with mashed potatoes and gravy.

Friday, June 17, 2011

Welcome to my cooking blog

I'm an accidental cook. By 'accidental' I mean,
I have been plunged to spend my time in
the kitchen to cook food out of necessity.

But having to cook out of necessity
doesn't have to be a chore. I eventually
learned my way around the kitchen
and hold out my own.

My culinary critics are my kids
and have commented that my cooking
has improved over the years.

This blog is about my quest and adventures in finding the
balance between cooking economical yet good tasting and nutritious
food.

In the past, I've posted cooking entries along with my
personal day-to-day entries in personal blog site.
It took me this long to realize that creating
a separate blog dedicated to cooking made sense.

So I hope you enjoy and visit my future cooking blog
entries.

Come back and visit often.

-Julius